You know how shops put stuff next to the tills, trying to get you to buy the stuff on an impulse as you're standing in line? You know how when you're 18 in less than a month, you really should no better than to comply?
Yeah, I know.
That doesn't really explain how, when my friend wheeled me out shopping after I returned from a fortnight in Birmingham, I came home with 4 of those little calendar tag thingies. You know those ones they use in primary school, that just tell you what day of the week a certain date is on?
Well, at least my impulse buys were only 25p each. There's a lot to be thankful for.
What You Need:
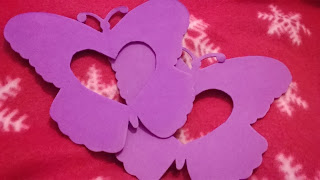
2 Foam Butterfly shapes (or just cut butterfly shapes out of foam)
Pen
Scissors
Coloured paper (I used 4 sheets, each a different colour. It was also the slightly thicker sugar paper, but only because that's what I had on hand)
30cm ruler
Glue stick
Wool
Drinking Straw
Calendar Tab
Sticky Tape
How to do it:
1. Start with the foam butterfly shapes
2. One one shape, draw a rough rectangle as big as possible, and inside this rectangle, draw a heart.
3. Cut the heart out of the first shape, then use this as a template to draw and cut out a heart on the other shape.
4. Cut out a rectangle of paper as big as the rectangle you can draw on the butterfly (but neater - I used a ruler for this rectangle)
5. Draw strips on one sheet of paper, using a ruler. My strips were about 1/4" thick.
6. Lay the lined sheet on top, and cut the strips out of all the sheets of paper at once (if you have too many sheets to cut out at once, do them in two goes. To draw lines on and cut each sheet individually would just take way too long)
7. If your strips are too long for your rectangle, like mine were, cut them in half.
8. Lay the first strip across the paper and glue it down.
9. Glue the second strip down at a contrasting angle (can you have a contrasting angle?)
10. Hopefully, the third strip should go across the first two without leaving a gap in the middle.
11. Keep on going around (not necessarily with three strips to a round)
12. And around
13. And around until you can't see any more of the base paper
14. Turn over the paper and use the back of the rectangle as a guide to cut of the excess of the strips, so your left with a rectangle again.
15. Repeat steps 8 through 14 on the other side, to leave you with the swirly pattern on both sides of the paper
16. Glue the paper in between the two butterflies (kind of like a sandwich) making sure the side with the pen on is facing inwards.
17. Tie the ends of three lengths of wool together and make a fairly tight plait, tying off the end.
18. You need 5 plaits in total, 2x 1 1/2 ", 2x 5". and 1x 14" approximately
19. Cut the bendy end off the drinking straw, cutting as close to the bend as possible
20. Tie the longest braid around the middle of the drinking straw.
21. Cut the ends off, and un-braid them
22. Attach the two shortest braids to the back of the calender tab with sticky tape.
23. Attach the top of the short braids in between the two layers of foam using sticky tape at the bottom of the butterfly. (at this point your calender gains a front and a back, so if you prefer one side to the other, make sure it's at the front)
24. Fix the ends of the remaining braids one to each layer of foam, to create two loops at the top of the butterfly
25. Thread the straw through the loops, keeping the big loop in the middle, so the calender can be hung.


.jpg)
.jpg)
.jpg)
.jpg)
.jpg)
.jpg)
.jpg)
.jpg)


No comments:
Post a Comment